
Mitigating risk...with soup cans!
Recently my wife and I were discussing what I'd do if I wasn't building and maintaining security systems all day. We both came to the same conclusion...I'd probably end up building and maintaining security systems all day.
There has always been something about a lock that fascinates me. Perhaps it's the cleverness (or perceived cleverness) of the mechanisms themselves. Or maybe it has to do with the mystery held behind the lock. To carefully manipulate such a mechanism open without the proper key is a thrill to me. So too the pure savagery of a successful destructive entry with drill or hammer, overwhelming cleverness through sheer brutality. Where things get really interesting for me though is mitigating vulnerabilities. In my experience there are many who find issues, but fewer who are willing and/or able to actually fix them. So when I faced with multiple reports of a particular safe I owned being easily exploitable, down the rabbit hole I go to mitigate the risk.
I received this floor safe a long time ago. It's really not much to speak of, but I see similar on the shelves all the time for non-insulated security. While scrolling through a certain video streaming service one day I found several examples of a simple exploit to bypass this very safe. It was such a silly sounding hack I naturally had to verify it was possible on mine, and found it certainly was. Since I didn't discover the vulnerability, I'll simply describe it with some images below, then move on to mitigation.
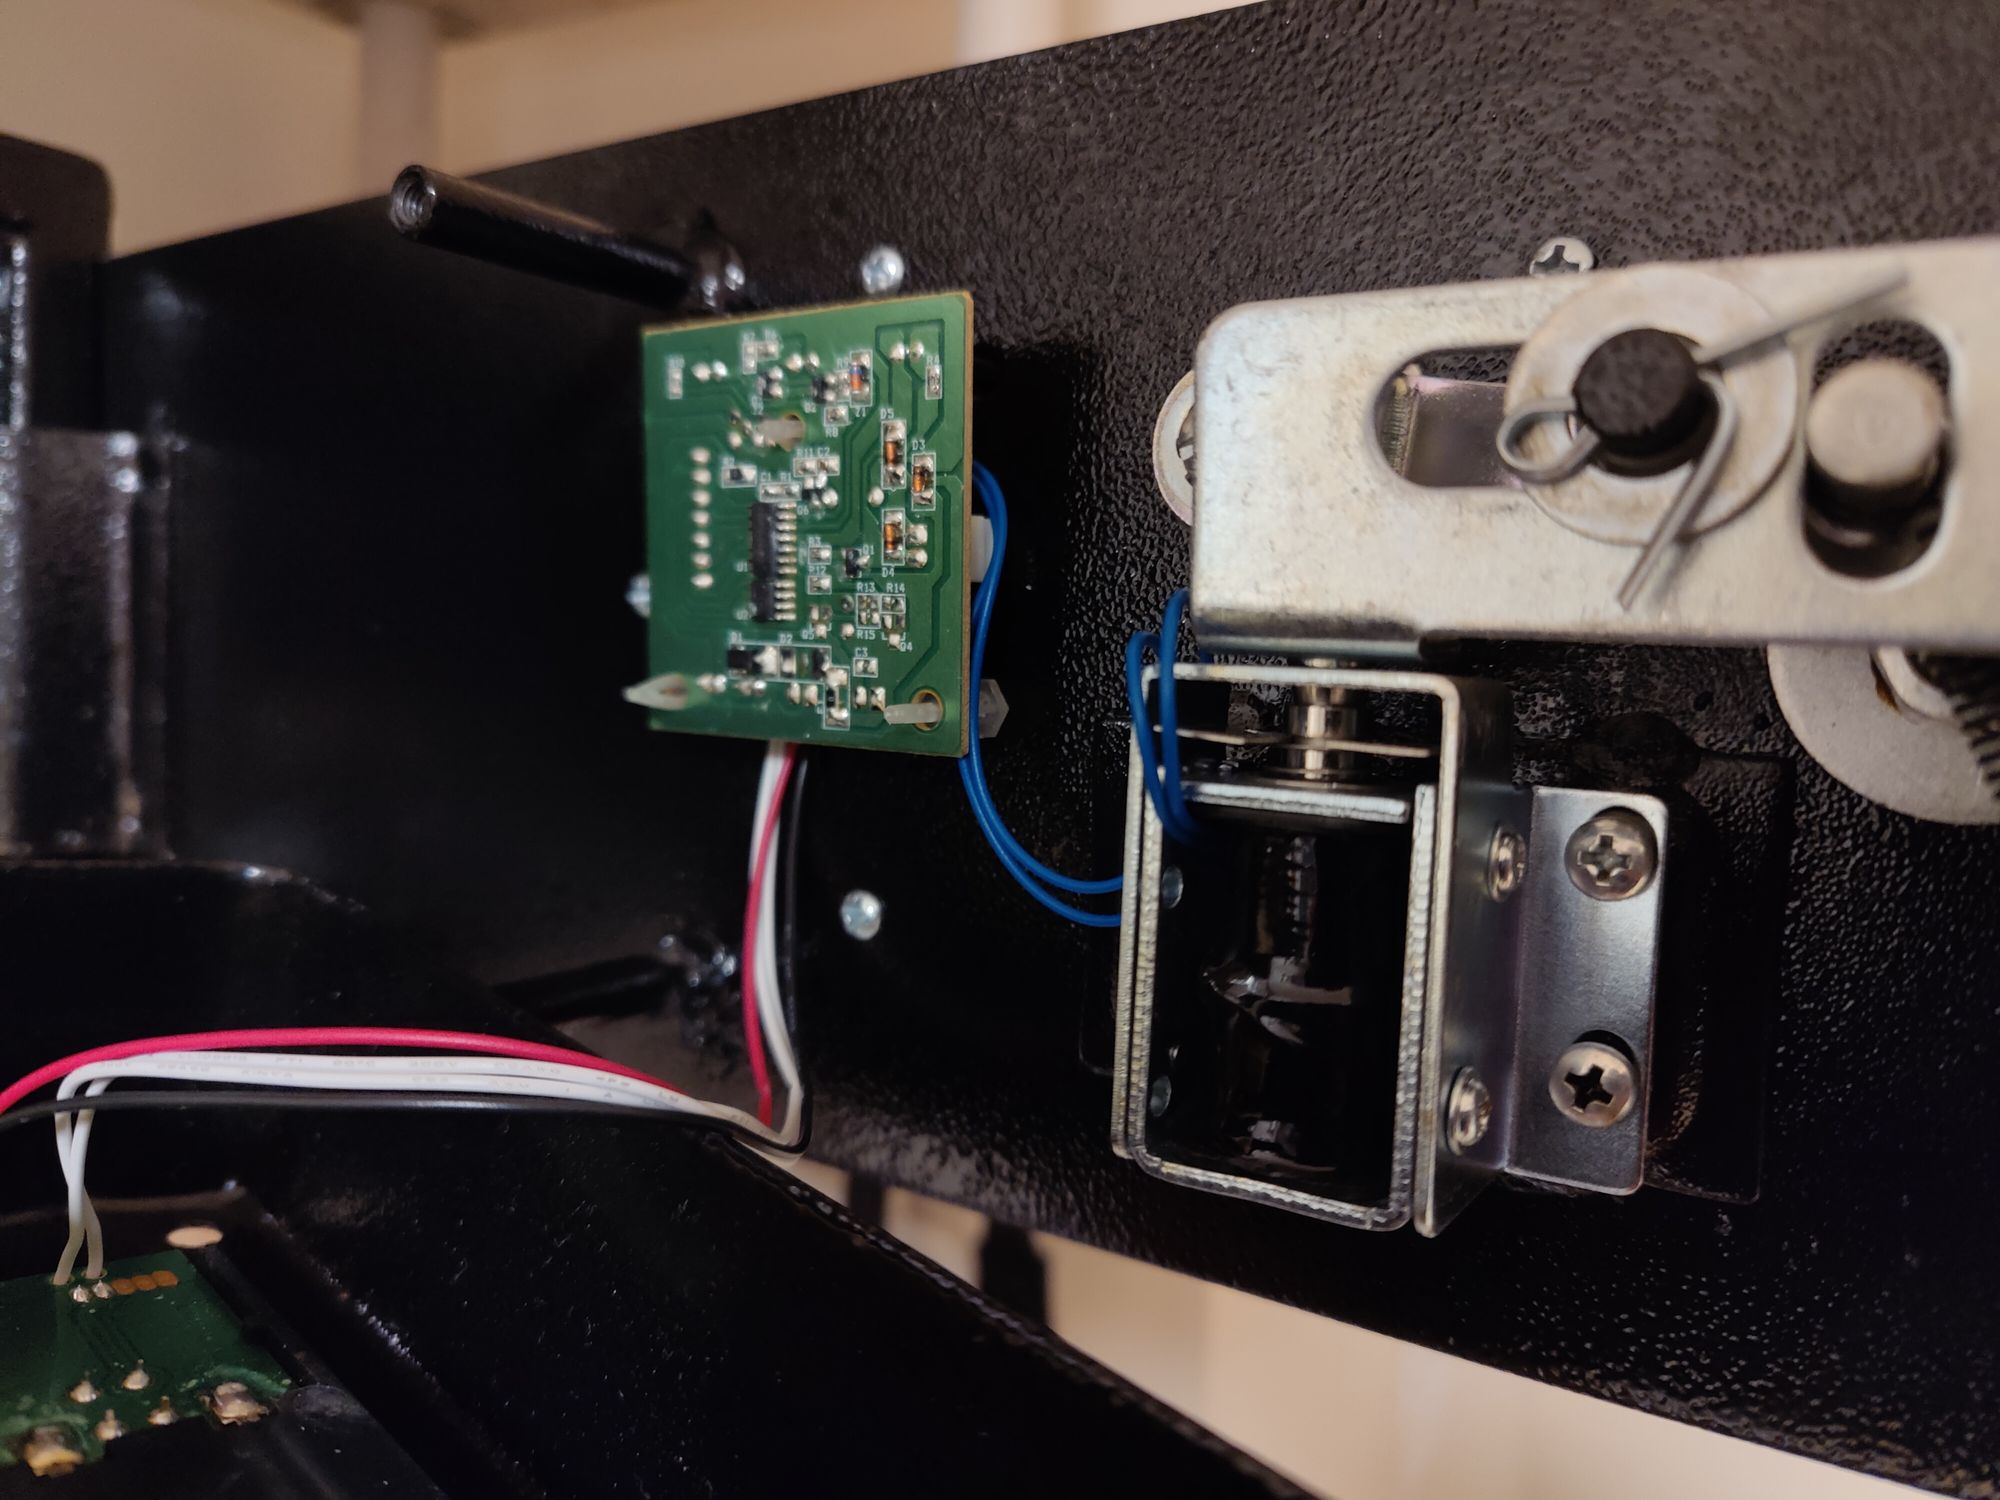
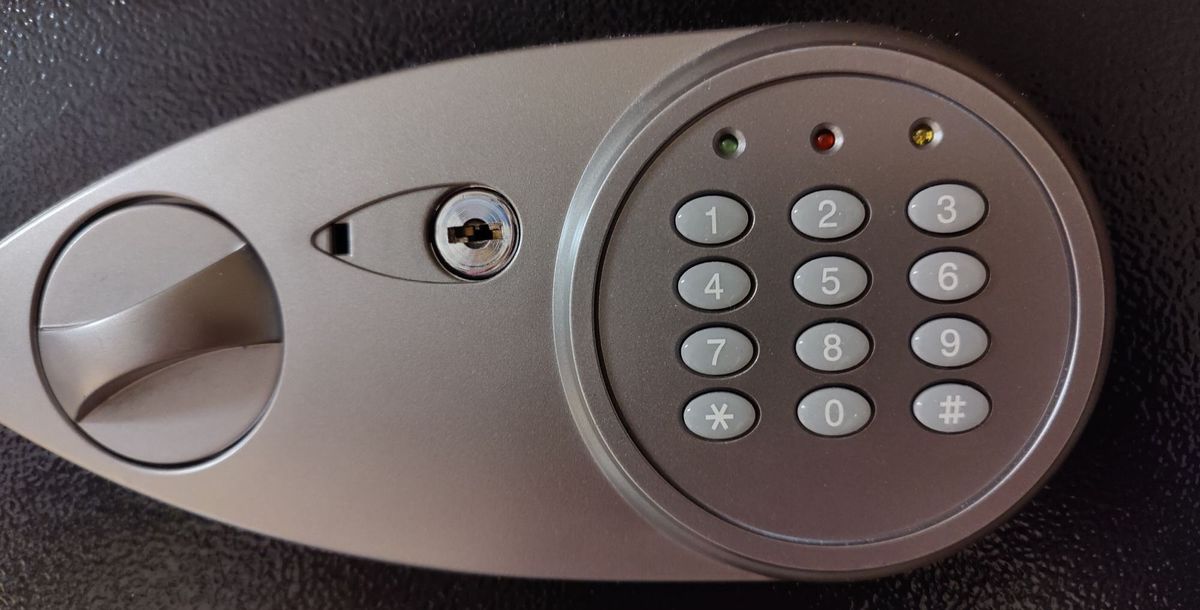
As you can see the circuit board on the left, the brains of the digital keypad controlling the solenoid locking release on the right, is affixed directly to the door of the safe. What you don't see are the three LED lights soldered to the board which go all the way through the case wall to the front, seen here from the front.
Using a section of coat hanger, one can trivially push past any one of the LED bulbs, make a left hand bend, and toggle the solenoid release from the inside, allowing the locking bolts to move and the case to open. This is a ridiculously easy compromise to do with very little evidence to show the case has been tampered with outside one of the lights being out of alignment. While I immediately wanted to throw out the case and recommend against anyone buying something similar, it occurred to me how ridiculous that sounded without even attempting a mitigations, so I set about solving the issue in a way that others might easily replicate, thereby mitigating the risk without spending another $50-$500 on a "better" safe.
My criteria were simple
1. Actually solve the problem of reaching the solenoid from the LED hole
2. Use common materials anyone might have on hand or cheaply acquire
3. Be as close to 'free' as possible to offset the time and sunk cost of purchase
For reference, this is a SentrySafe Medium Security Safe with Digital Keypad. The exact model is unknown as its branding has been removed, but the latest models retail for $130, I price I would imagine most people would want to avoid paying again to replace the safe should the developer fail to harden the design.
My first idea was simply welding a piece of steel between the circuit board and solenoid to block access, but this solution failed my criteria multiple ways. Most people don't have a welder lying around, let alone know how to use it. Also it introduced the risk of damaging the safe if the components overheated under such tight constraints. My final solution was much simpler and, in retrospect, much harder to circumvent than a single sided barrier.
Can it...
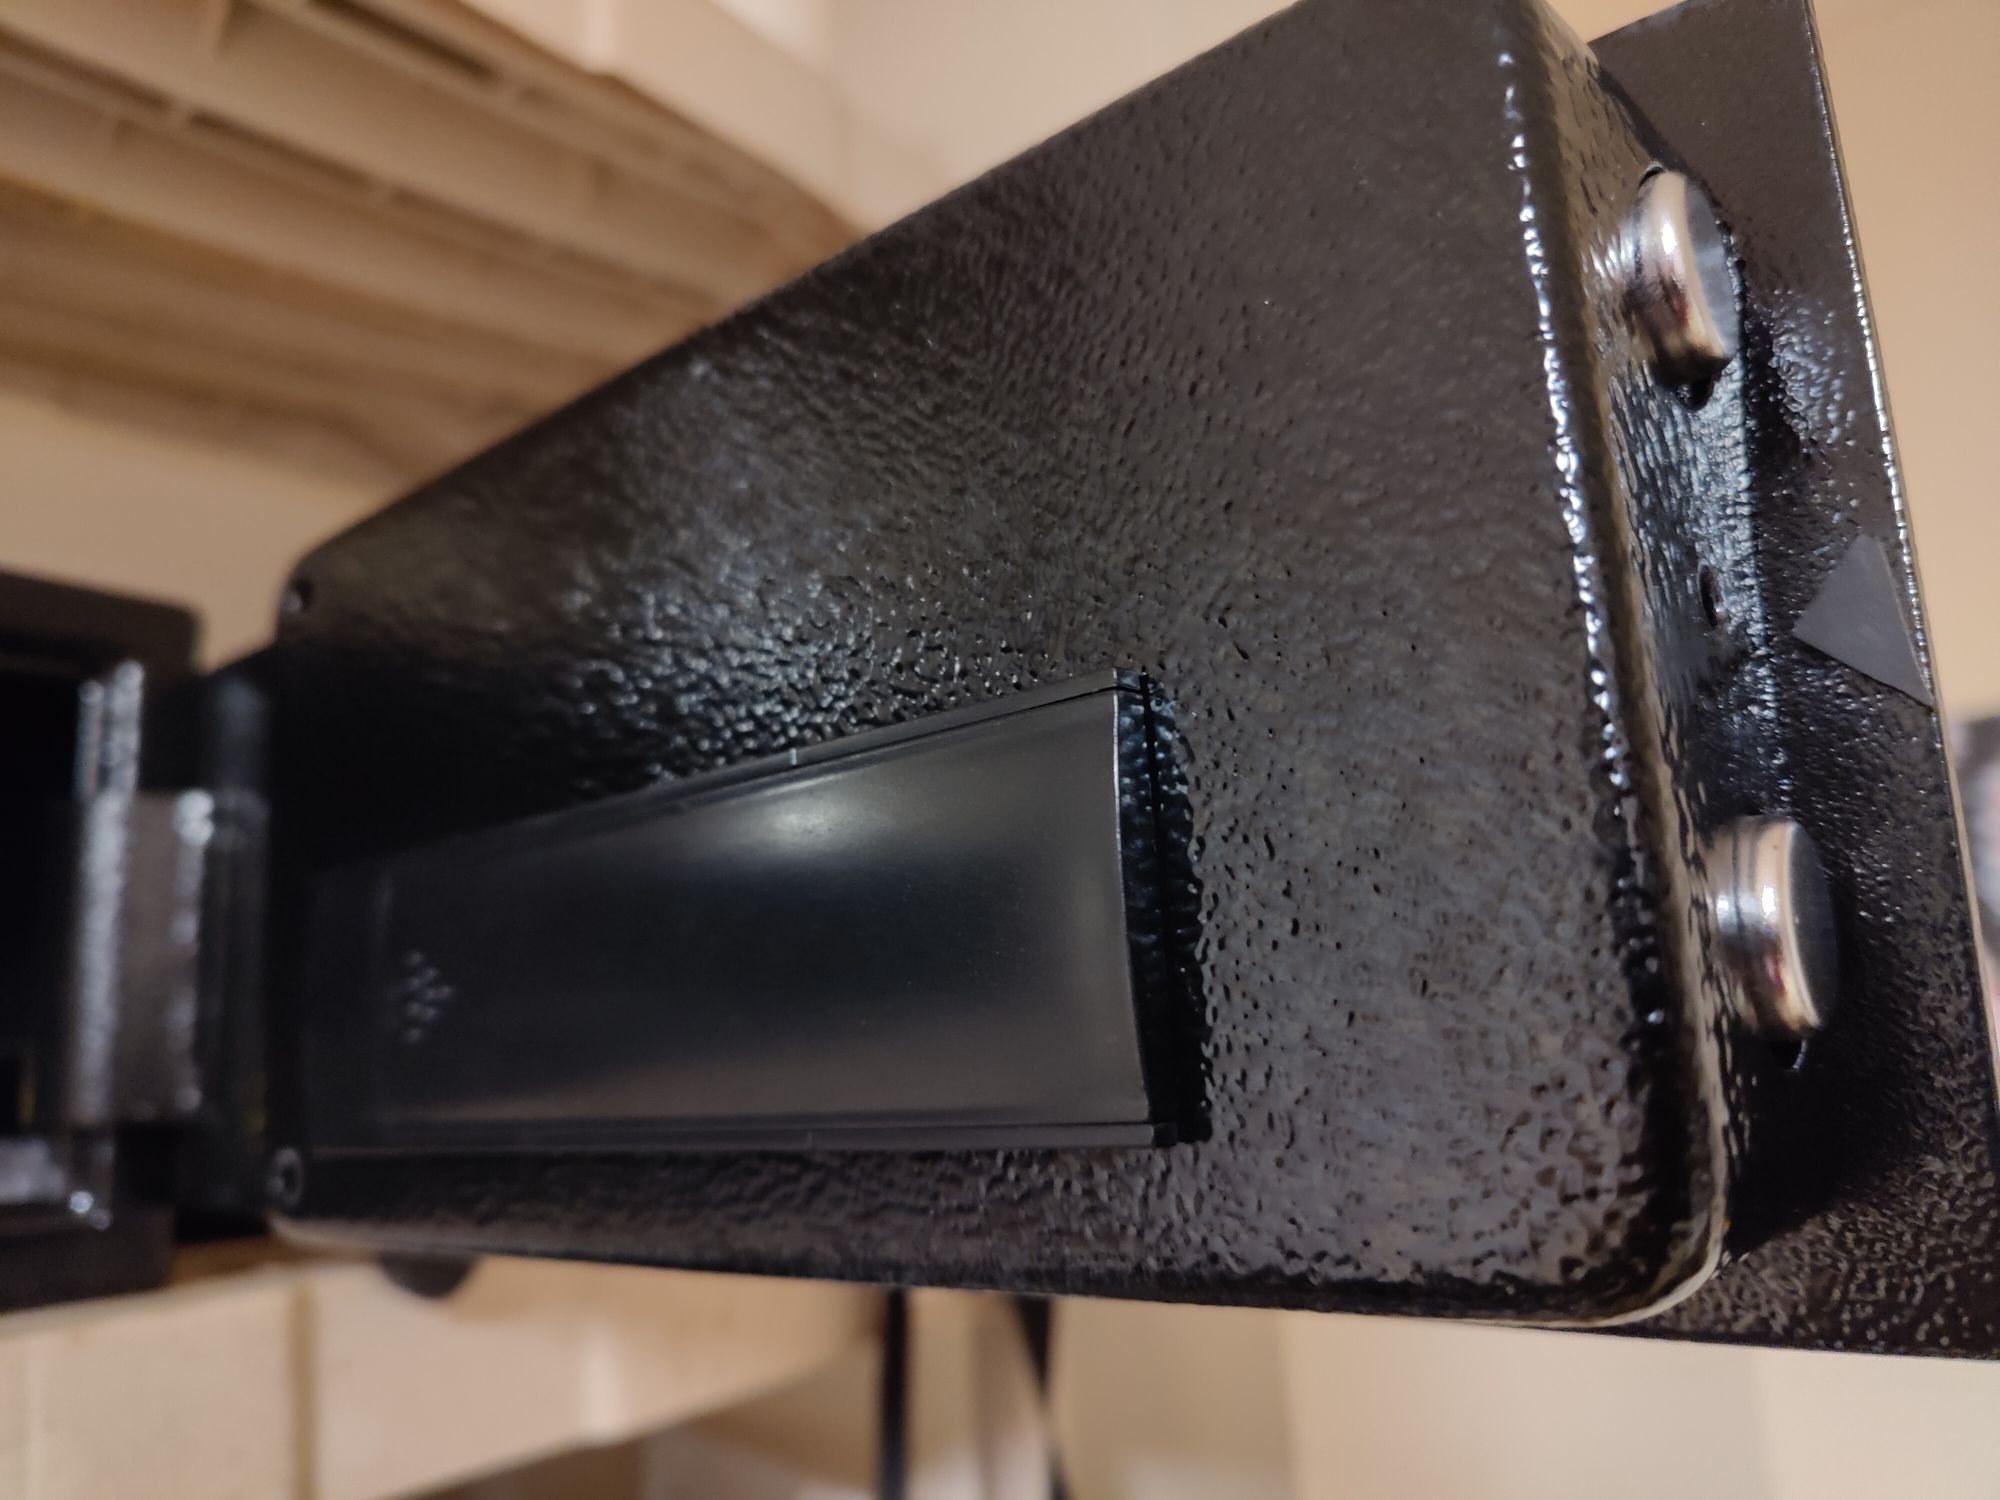
First, let's get a metal soup can. Cans are great for metal work as they readily available and can be used a few different ways. This one we're going to cut down to size so that it fits over the entire circuit board. The wires conduct electricity to the solenoid so there isn't any issue with radio frequency interference once it's cut down to size.
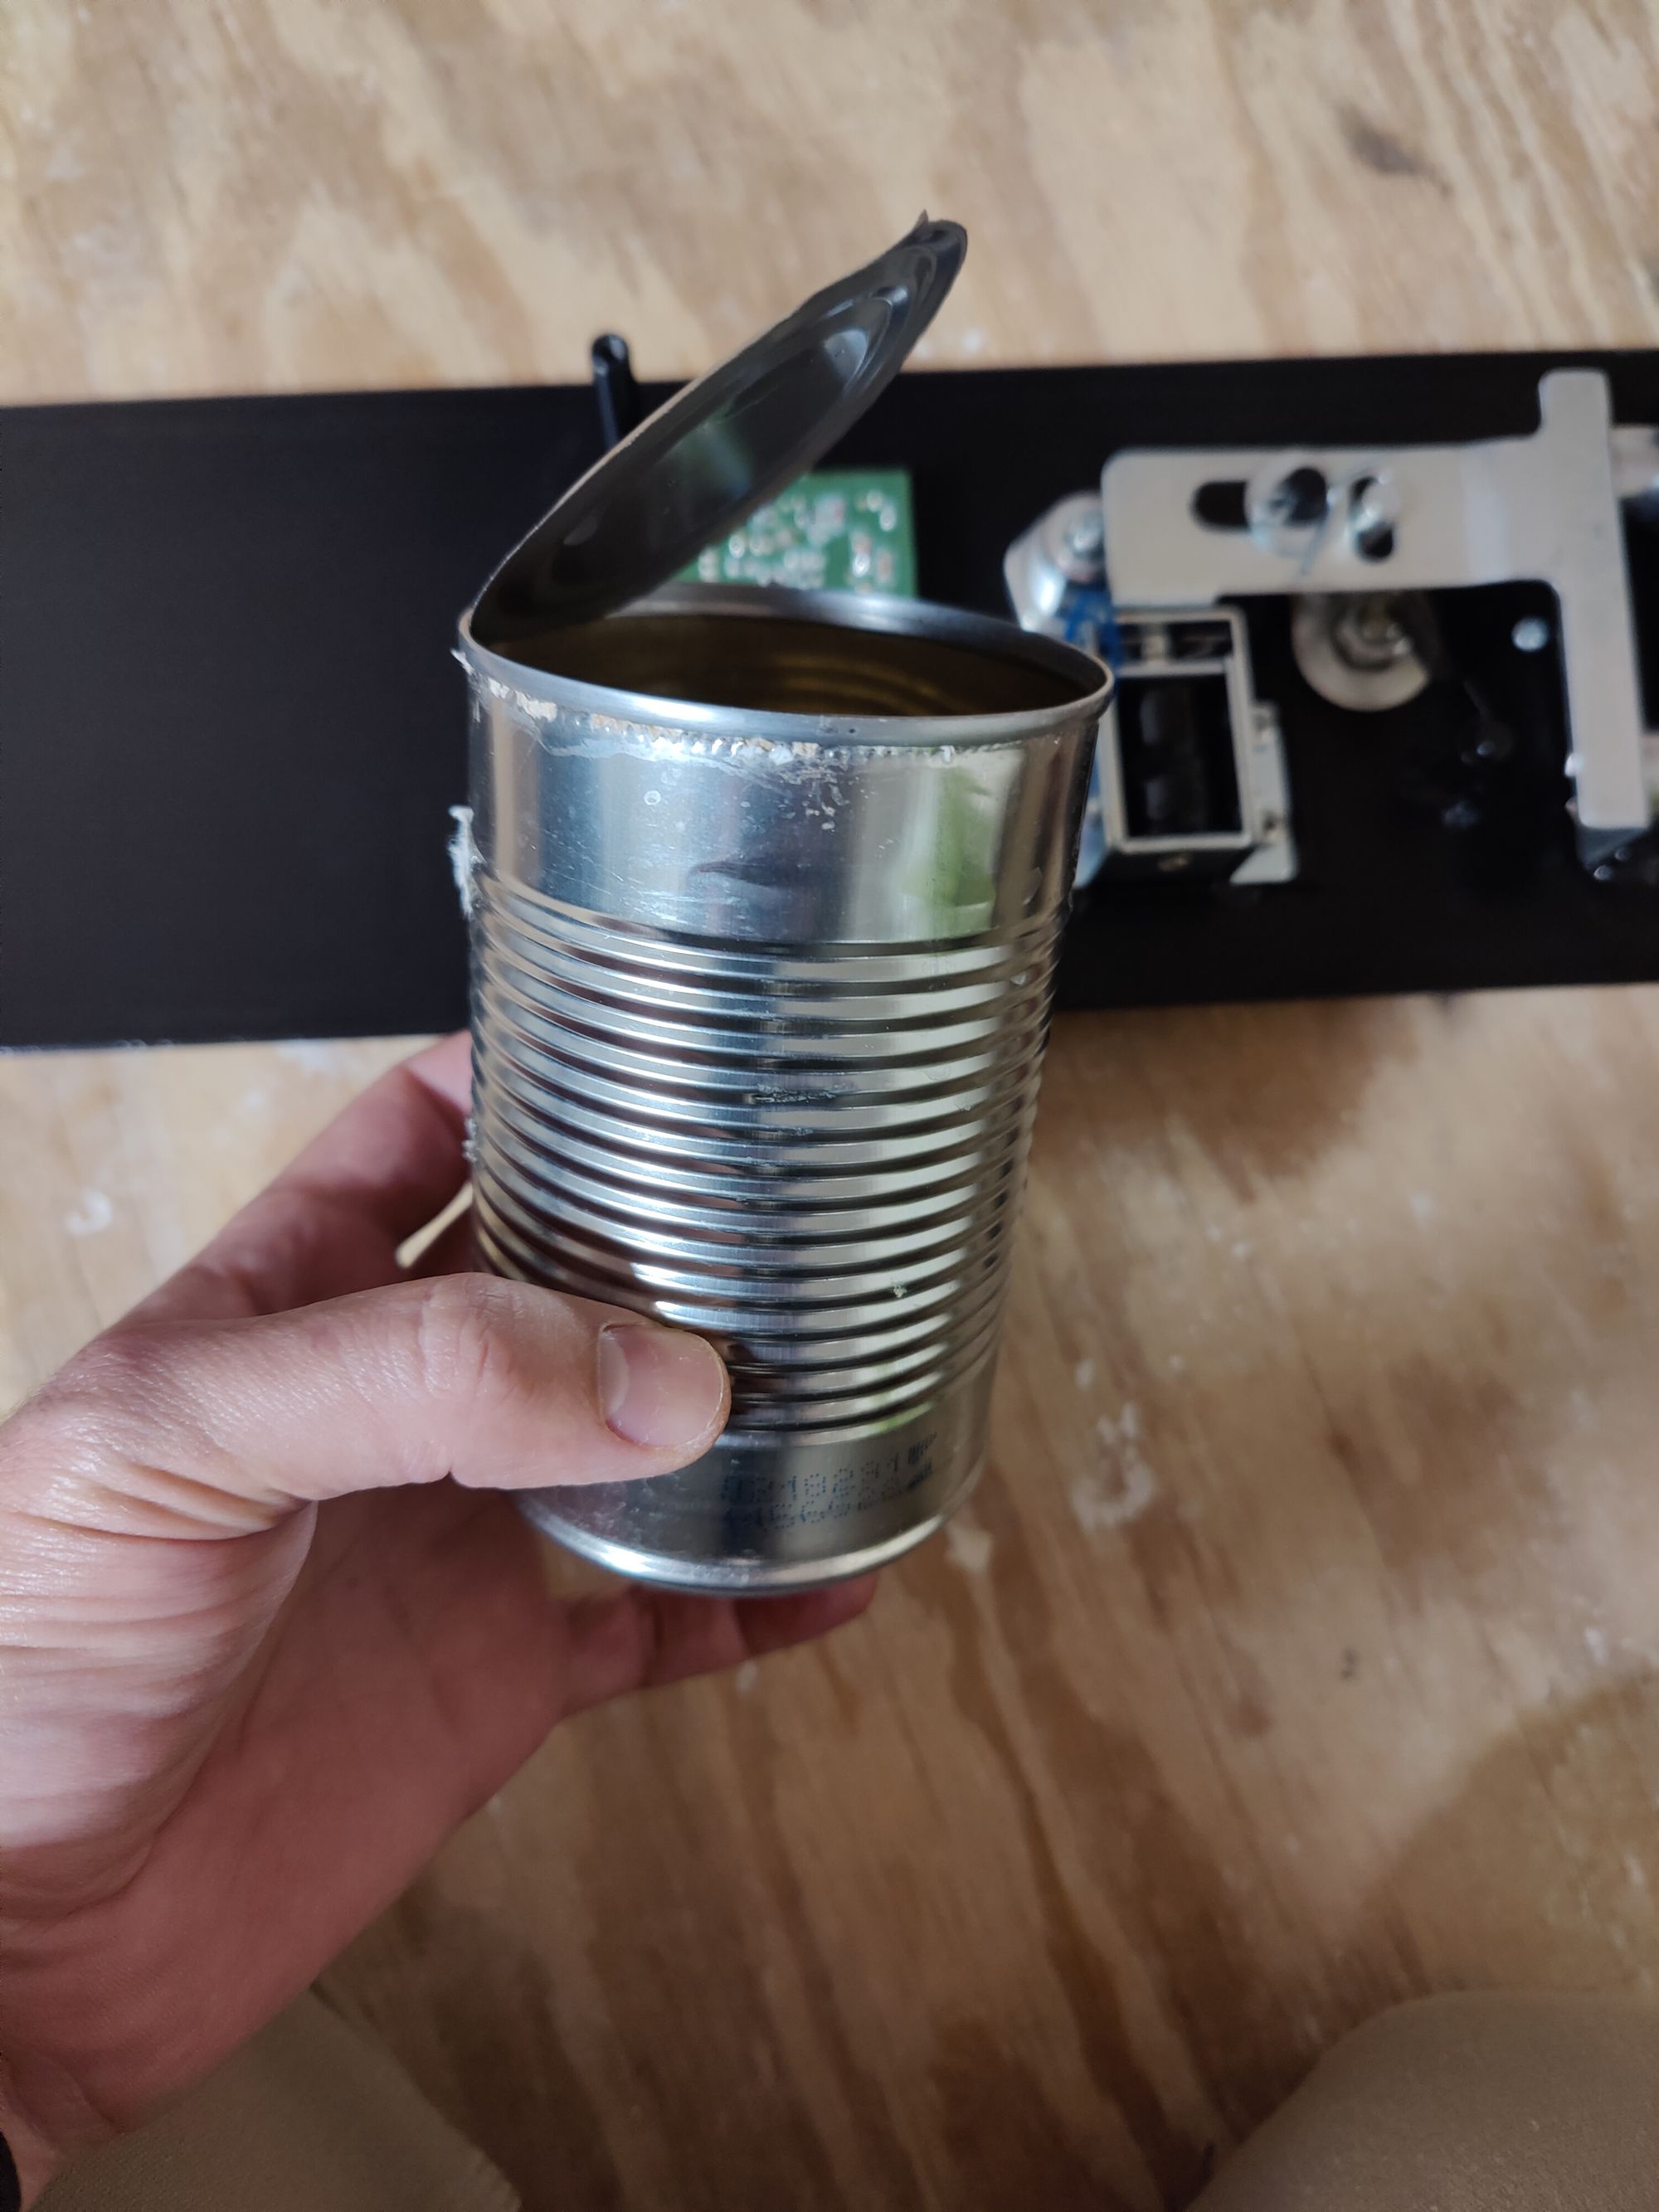
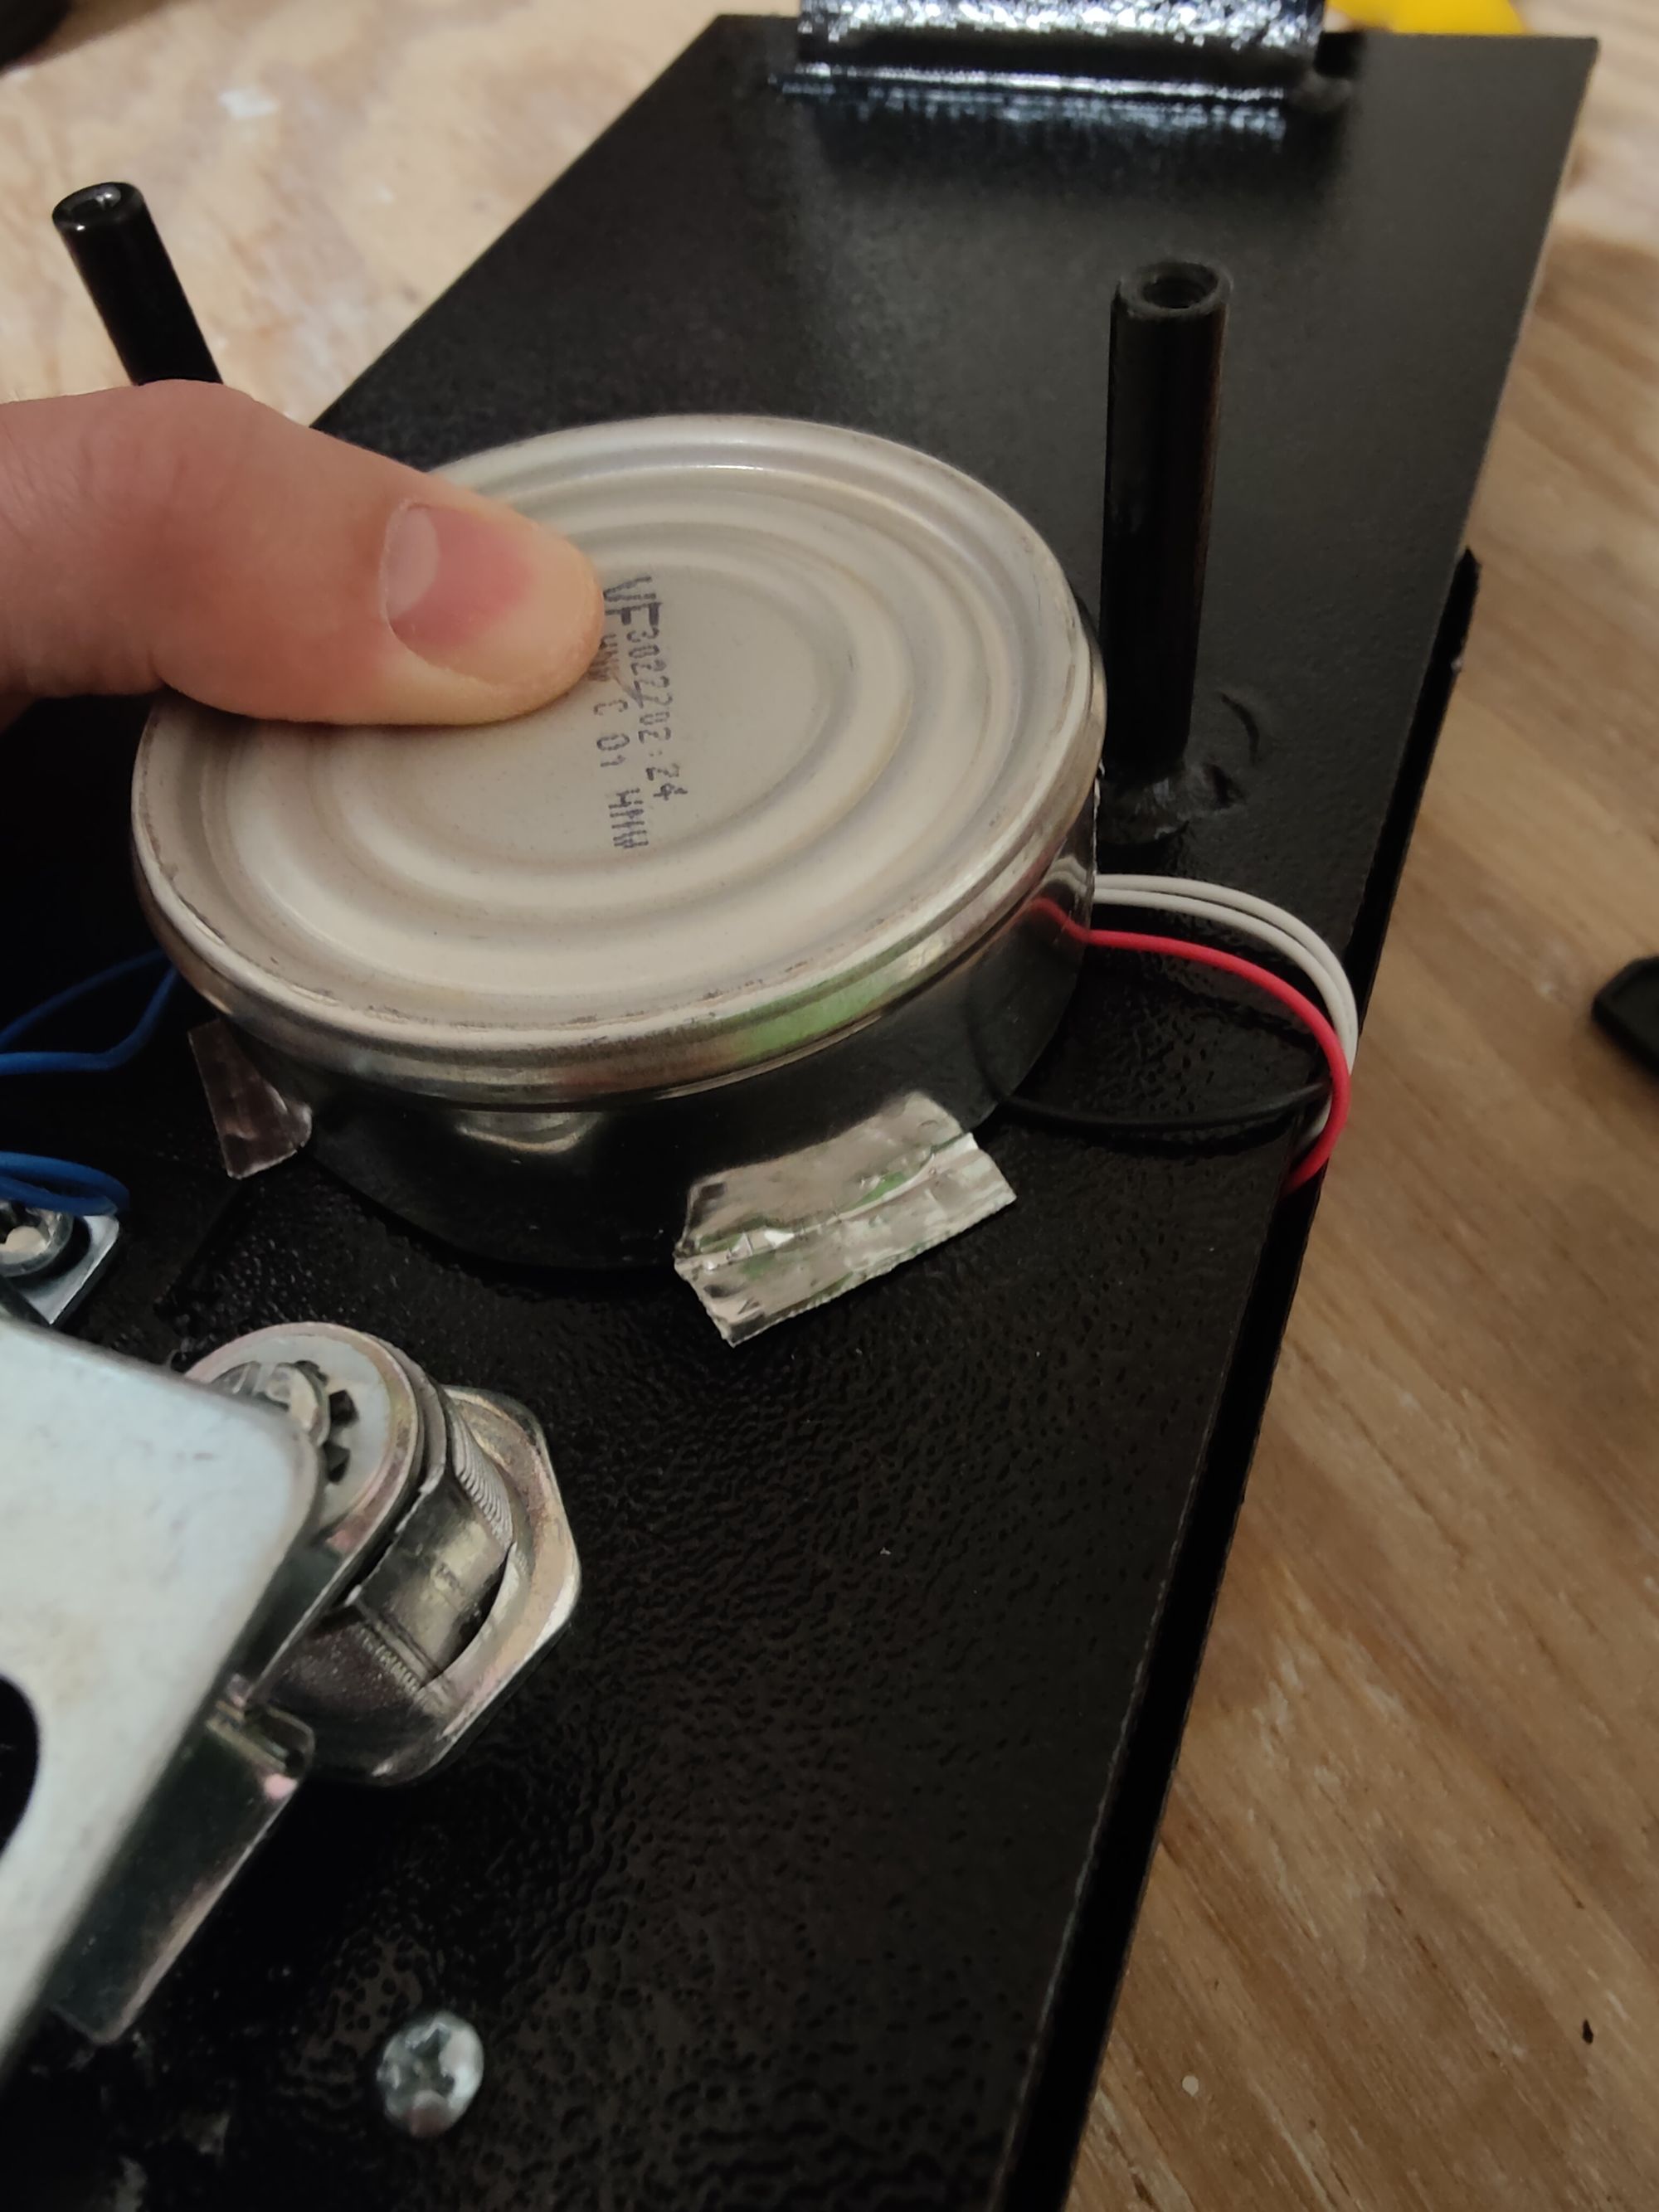
Using tin snips, I cut off the excess can and fashioned a few feet that could be bent out and used as mount points. These can be glued to the back of the safe. I used a glue-gun, but one could also use silicon or JB-Weld just as well. Be mindful of gravity though and make sure if you use a long setting glue to orient the safe to avoid it sliding down. Again, it just needs to be strong enough to baffle an attempt to push in the LED and attack the solenoid using something like a coat hanger.
One note here. If you've made it this far you may be contemplating removing the door to make the modification a little simpler. Word of advice:
DON'T TAKE OFF THE DOOR!
I did this on mine and wouldn't recommend it. It isn't necessary to apply our baffle nor is it easy to replace. So let's say it together now...
The final product should look something like this, providing 360 degrees to baffle a would-be attacker or adolescent looking to one-up Mom/Dad on who controls the remote.
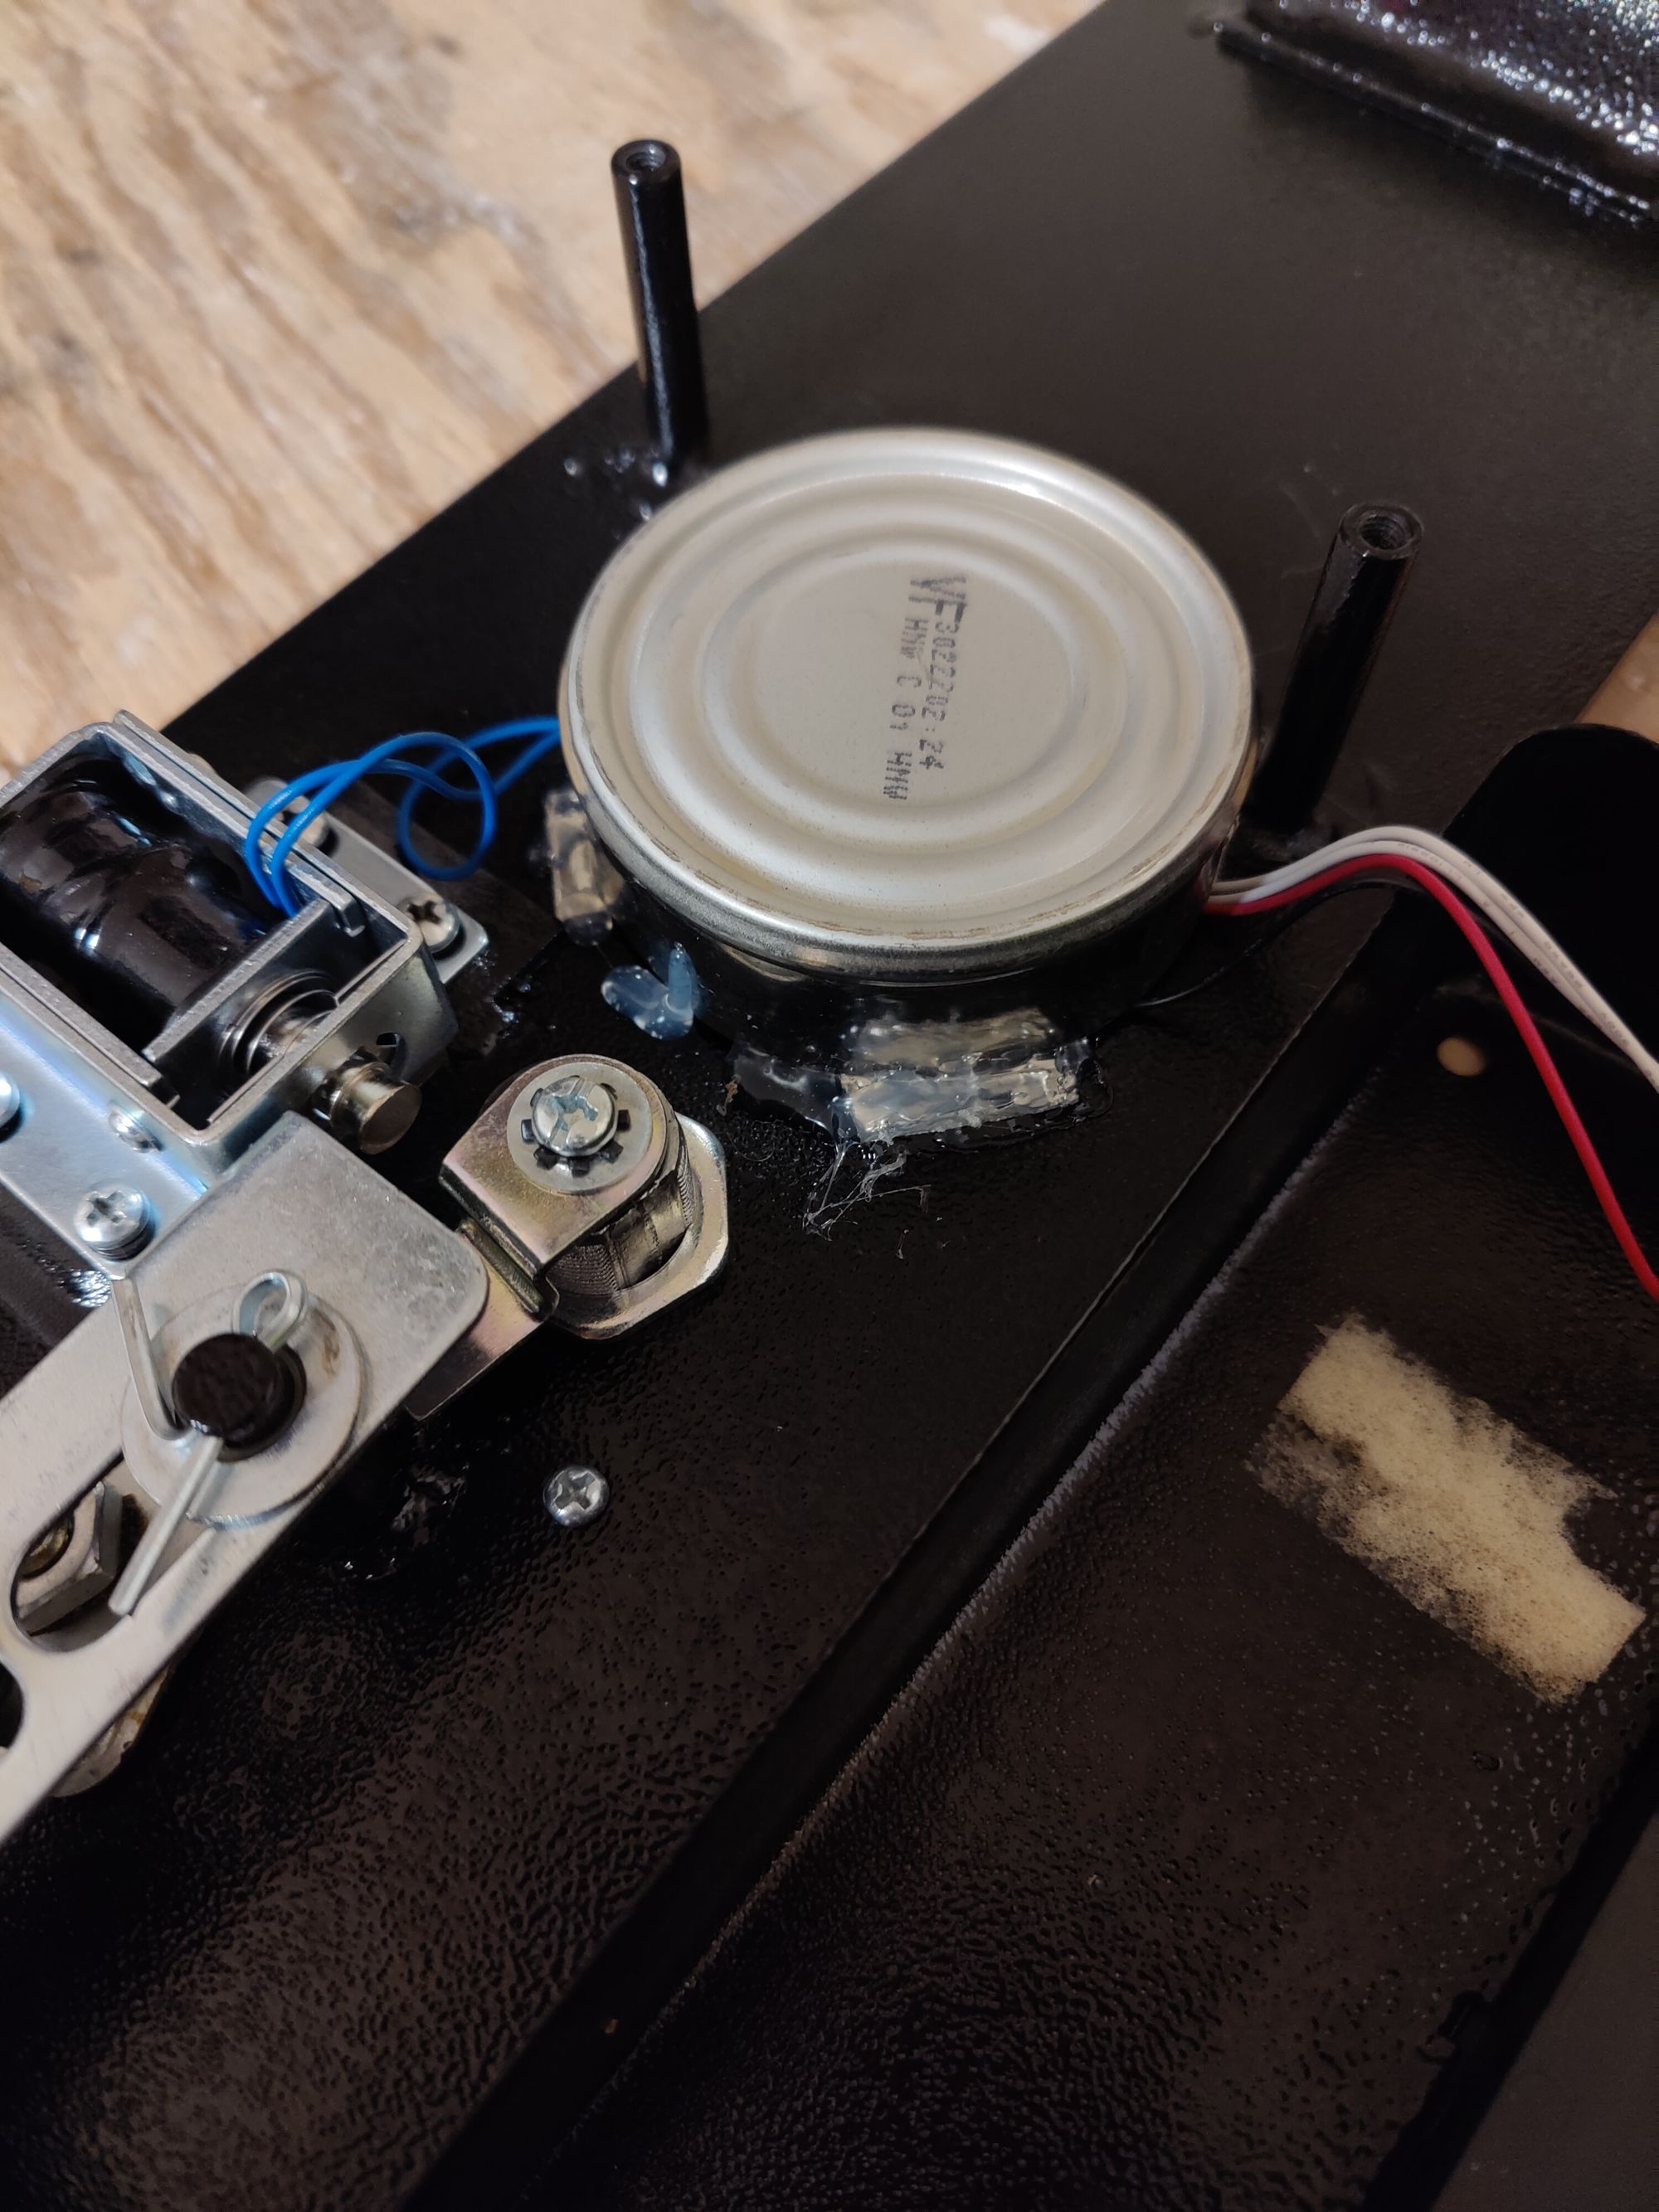
Once the safe is put back together, you shouldn't have any further issues with the solenoid being accessed from the three LED holes in front of the circuit board.
Testing and conclusion...
After reassembling the safe door with it's new baffle, I decided to test dislodging the baffle using a straight pick. This seems to be the most obvious threat to the new design, especially when something like a glue-stick is used over something harder like a weld product. What I found though is that, for something fitting through that tiny LED hole is going to be very susceptible to bending under pressure, making it less than ideal to dislodge. Also it would have press into the circuit board itself, causing more disruption to the system and damage that would make the attack more apparent regardless of it's success. Finally, I found the battery pack actually makes a decent backer for the baffle, as it protrudes into the lock body area about half an inch. Even if the baffle was dislodged, it wouldn't be falling complete away, making manipulation a tricky business. All in all, a stupid simple mitigation for a stupid simple vulnerability which only takes a few minutes and basic items to accomplish.
Cheers!